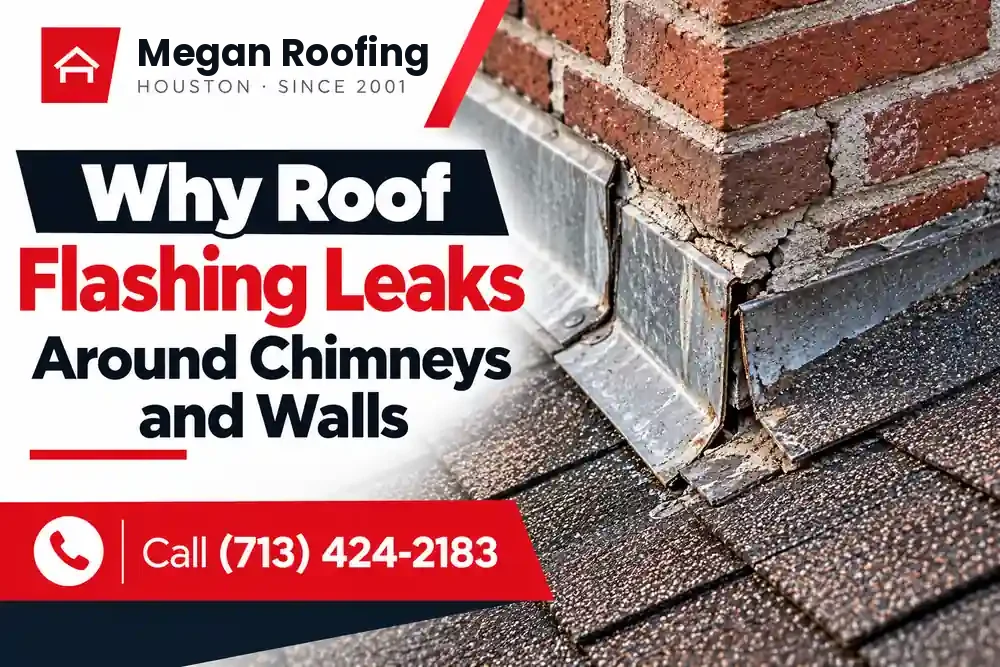
A roof can have durable shingles and still develop a leak around a chimney or exterior wall. The problem often comes down to flashing: the protective material that seals vulnerable joints where roofing meets vertical surfaces.
These areas need special attention because rainwater naturally follows roof slopes, runs against walls, and collects around obstacles. If flashing is damaged, poorly installed, or no longer fits correctly, water can find its way beneath the roofing materials.
For homeowners in Houston, TX, heavy rainfall, wind-driven storms, humidity, and prolonged heat can put these connections under additional stress. Understanding why flashing leaks develop can help you recognize early warning signs and arrange repairs before moisture damages the roof deck, insulation, or interior finishes.
What Is Roof Flashing and Why Is It Important?
Roof flashing is a weather-resistant component installed around joints, edges, and penetrations where water could enter the roofing system. It helps direct rainwater away from vulnerable areas and onto the roof surface or into the drainage system.
Chimneys and exterior walls require different flashing arrangements because their shapes and connections to the roof are different.
Chimney Flashing
A chimney usually needs several flashing components working together to prevent water from entering the roof.
Base Flashing
Base flashing protects the lower joint where the chimney meets the roof. It helps direct rainwater away from this vulnerable connection and onto the surrounding roofing surface.
Step Flashing
Step flashing is installed in overlapping sections along the sides of a chimney or wall. Each piece works with the shingle courses to guide water down the roof rather than behind the roofing materials.
Counterflashing
Counterflashing covers the upper edges of the underlying flashing and helps prevent water from entering behind the metal. Around masonry chimneys, it is commonly integrated into the mortar joints.
Chimney Cricket or Saddle
A chimney cricket is a raised, sloped structure installed behind certain wide chimneys. It divides the flow of rainwater and directs it around the chimney, helping reduce water accumulation on the uphill side.
Roof-to-Wall Flashing
Where a sloped roof meets a vertical wall, step flashing and properly integrated wall protection help keep water out of the joint. Kick-out flashing may also be needed at the lower end of the roof-to-wall intersection to direct runoff into the gutter rather than behind the siding.
The effectiveness of these components depends on correct installation, suitable materials, and proper integration with shingles, masonry, siding, and other building materials.
6 Common Reasons Roof Flashing Leaks Around Chimneys and Walls
1. Damaged or Loose Chimney Flashing
Metal flashing can deteriorate, become displaced, or develop gaps as a roof ages. Wind, movement between building materials, corrosion, and previous repair work can all contribute to the problem.
When flashing pulls away from a chimney or loses its protective overlap, rainwater may enter the joint and reach the roof decking or attic.
Common warning signs include:
- Visible gaps between the chimney and flashing.
- Bent, lifted, or corroded metal.
- Water stains on nearby ceilings or walls.
- Dampness in the attic after rainfall.
The appropriate repair depends on the extent of the damage. A roofer may be able to repair a localized section, but deteriorated or incorrectly installed flashing may need replacement.
2. Missing or Improperly Installed Step Flashing
Step flashing protects the joint between a sloped roof and a vertical wall. Individual pieces are normally installed in sequence with the shingle courses so water is directed down the roof rather than behind the wall covering.
Problems arise when flashing pieces are missing, overlaps are insufficient, or the flashing has been installed in a way that does not provide the intended protection.
This type of defect can remain hidden beneath siding or roofing materials, making the leak difficult to trace from the ground.
What to look for:
- Repeated water stains near an exterior wall.
- Damaged or displaced shingles along the roof edge.
- Evidence of previous repairs that rely heavily on surface sealant.
A proper repair should restore the intended layered, water-shedding arrangement instead of simply covering the visible gap.
3. Cracked Mortar Joints and Failed Sealant
Counterflashing around a masonry chimney may be secured into mortar joints. Over time, mortar can crack or deteriorate, allowing the flashing connection to loosen.
Sealant can also shrink, split, or lose adhesion because of weather exposure and movement between materials. However, not every flashing system depends on caulk as its primary water barrier.
Applying another layer of sealant over a failed connection may conceal the problem without fixing it.
A lasting repair may involve:
- Repointing deteriorated mortar joints.
- Reattaching or replacing loose counterflashing.
- Restoring the flashing’s proper overlap with the underlying components.
- Using compatible sealant where the system requires it.
The goal is to restore the complete flashing detail, not just make the surface look sealed.
4. Missing Kick-Out Flashing
Kick-out flashing is installed where a sloped roof terminates against a wall, near the gutter. Its purpose is to direct runoff away from the wall and into the drainage system.
Without it, water can flow behind siding or other exterior finishes. Over time, repeated exposure may damage wall sheathing, insulation, trim, or interior surfaces.
The damage may appear some distance from the actual entry point, which can make the cause easy to overlook.
Potential signs include:
- Water stains near the lower end of a roof-to-wall junction.
- Peeling exterior paint or deteriorating siding.
- Moisture around the wall below the roof edge.
- Damage near the gutter and adjacent wall.
The repair should provide a proper drainage path and integrate with the roof, wall covering, and gutter system.
5. Corroded Metal and Loose Fasteners
Some flashing systems use exposed metal fasteners, while others rely on concealed attachment methods. Corrosion, movement, or incorrect fastener placement can compromise the flashing and create potential entry points for water.
Metal can deteriorate faster when unsuitable materials are combined or when water remains trapped around a connection. Fastener problems may also indicate a broader installation issue rather than an isolated defect.
A professional inspection should assess the condition of the metal, attachment points, surrounding roofing materials, and any signs of moisture damage. The repair may require replacing corroded components, correcting the attachment, or rebuilding the affected section.
6. Poor Drainage Behind a Chimney
A wide chimney can interrupt the normal flow of rainwater down a sloped roof. The uphill side may collect leaves, branches, and other debris, while poorly designed drainage details can allow water to accumulate.
A properly designed cricket or saddle helps divide the water flow and direct it around the chimney. Whether one is required depends on the chimney’s dimensions, roof design, applicable code, and project conditions.
Warning signs may include:
- Debris repeatedly collecting behind the chimney.
- Water stains that appear after prolonged or heavy rainfall.
- Damaged shingles around the uphill side of the chimney.
- Signs of water accumulation or deterioration near the flashing.
The solution may involve correcting the flashing, improving drainage, removing debris safely, or addressing a more extensive design or installation problem.
Signs That Flashing May Be Leaking
Interior symptoms can help identify a possible flashing problem, although they do not confirm the source on their own.
Ceiling Discoloration
Brown or yellow stains near a chimney or exterior wall may indicate that water is entering the roofing system. Stains that become darker after rainfall deserve further investigation.
Peeling Paint or Bubbling Drywall
Moisture can cause paint to bubble, crack, or separate from interior surfaces. Similar damage may occur around upper walls and ceiling corners.
Musty Odors in the Attic
Persistent dampness can create an unpleasant smell in an attic or upper room. Wet insulation and concealed moisture may be present even when no water is actively dripping.
Wet Insulation or Roof Decking
Water entering through flashing may travel along roof decking and framing before reaching the insulation. Dark marks, damp wood, and visible water trails can indicate a moisture problem.
Leaks That Return After Rain
A stain that repeatedly returns after rainfall may indicate an unresolved flashing problem or another source of moisture. The visible stain does not necessarily sit directly below the entry point.
Common Flashing Problems and Recommended Repairs
| Flashing problem | Likely contributing factor | Typical repair approach |
|---|---|---|
| Loose chimney flashing | Movement, damaged attachment, or poor installation | Repair or replace affected flashing |
| Failed counterflashing | Deteriorated mortar or separated metal | Restore the masonry connection and flashing overlap |
| Missing step flashing | Installation defects or previous roof work | Rebuild the roof-to-wall flashing detail |
| Missing kick-out flashing | Incomplete drainage protection | Install suitable flashing integrated with the wall and gutter |
| Corroded metal | Age, moisture, or incompatible materials | Replace damaged components with compatible materials |
| Water collecting behind a chimney | Poor drainage or debris buildup | Assess drainage and cricket requirements |
The correct repair depends on the roof design, material condition, and confirmed source of the leak.
How to Prevent Future Flashing Leaks
Although flashing eventually needs maintenance or replacement, regular attention can help identify problems before they cause extensive damage.
- Arrange periodic roof inspections. Have vulnerable joints checked, especially after severe storms or when the roof shows signs of aging.
- Keep drainage paths clear. Remove debris from gutters and have areas around chimneys assessed for drainage problems.
- Address small defects promptly. Loose metal, damaged shingles, and deteriorating mortar should be evaluated before moisture spreads.
- Use compatible materials. Flashing metals, fasteners, sealants, and surrounding materials should be suitable for the specific roofing system.
- Check previous repairs. If a leak returns, investigate whether the original cause was corrected instead of repeatedly applying sealant.
Avoid climbing onto a wet, steep, or storm-damaged roof. Ground-level observations and photographs can help document a concern, but concealed flashing defects usually require a closer professional assessment.
When Should You Call a Roofing Professional?
A professional inspection is recommended when you notice recurring ceiling stains, visible gaps around chimney flashing, damaged step flashing, or signs of water entering around a roof-to-wall connection.
Seek prompt assistance if water is actively entering the property. If a ceiling is sagging or moisture is near electrical equipment, keep people away from the affected area and address the immediate safety risk.
A qualified roofer can inspect the visible flashing, surrounding shingles, masonry or siding connections, and accessible attic areas to help determine where water is entering. The repair may be localized, but widespread deterioration or concealed damage could require additional work.
Roof Flashing Repair in Houston, TX
Flashing leaks around chimneys and walls often begin with a small gap, a deteriorated connection, or a drainage detail that no longer directs water correctly. Finding the actual cause is essential because sealing the visible symptom alone may not prevent the leak from returning.
Megan Roofing ((713) 424-2183) provides roof leak assessment and repair services in Houston, TX. If you notice water stains or suspect damaged flashing, request an estimate to discuss the condition of your roof and the repair options available for your property.